An AI staging tool will never tell you the photo you uploaded was a bad choice — it will just generate a worse result and let you assume the tool is the problem. There's no error message for "this angle doesn't give the model enough to work with" or "that resolution won't hold up on MLS." The model does its best with whatever it's given, and a source photo with the wrong angle, bad light, or too little resolution caps how good any generation can be, no matter how many times you regenerate. This is a pre-upload checklist for catching that before you spend a generation on a photo that was never going to work.
Why this matters more than which style you pick
Two agents upload photos of the same vacant room. One shoots it from the doorway, phone tilted down, blinds closed. The other stands in the corner, holds the camera level, and turns the lights on. Same room, same tool, same style pick — the second photo will out-perform the first every time, because the model is reconstructing furniture, shadows, and scale from what's actually in the frame. A bad source photo isn't a disadvantage the AI can fully compensate for; it's a ceiling on the result.
If you've already hit this — a result that looks a little off no matter how many times you regenerate — see why AI virtual staging looks fake for the seven ways a generation can go wrong. This guide is about the step before that: whether the photo you're about to upload gives the model a fair shot in the first place.
The pre-upload checklist
Run through this on the photo itself, before you upload it — not on the result afterward.
File format first — before any of the six checks below matter. VirtualStaging.tools accepts JPEG, PNG, and WebP. It does not accept HEIC — the format iPhone cameras save to by default since iOS 11. If you shoot on an iPhone and haven't changed this, every listing photo you take is HEIC, and the upload will simply be rejected, not staged badly. Fix it once in Settings → Camera → Formats → Most Compatible, or export/convert the specific file to JPEG before uploading.
1. Angle and camera height
Shoot from a corner of the room, not from the doorway, and hold the camera at roughly chest height (~48 inches) rather than pointing down from standing or up from a crouch. A corner position shows two walls and the floor plane clearly, which gives the model an unambiguous sense of the room's actual shape. A doorway shot foreshortens the room and hides most of the floor — the model has less to anchor furniture placement to, and scale errors get more likely.
Quick test: can you see at least two full walls and where the floor meets both of them? If the shot mostly shows one wall or cuts off the floor, reposition before you upload.
2. Lighting
Turn the lights on, shoot in daylight if the room has windows, and expose for the room rather than the view outside. Two failure modes show up constantly: dark, underexposed corners where the model has to guess what's there, and blown-out windows that read as pure white with no detail. Both starve the model of information it needs to place shadows correctly — mismatched shadow direction is one of the most common reasons a staged photo reads as synthetic.
Quick test: look at the darkest corner and the brightest window in the photo. If either is a flat block of color with no visible detail, the exposure is fighting you.
3. Resolution
Shoot at full resolution — a modern phone camera is enough, but only if you don't crop down to a thumbnail-sized export first. A low-resolution upload doesn't just look soft after staging; it gives the model fewer real pixels to reconstruct textures and edges from, so fine details (fabric weave, shadow gradients, edge sharpness) come out mushier than a high-res input of the same room would.
Quick test: if you can't tell from the original file whether a doorknob or light switch is in sharp focus, the file is too small or too compressed to stage well.
4. Perspective and lens distortion
Real estate photography leans on wide lenses to make rooms feel spacious, and that's usually fine — but extreme wide-angle or fisheye distortion bends straight lines (door frames, ceiling edges, floor-wall seams) into curves. The model has to infer the room's true geometry from those bent lines, and the more extreme the distortion, the more room it has to get the vanishing point wrong, which shows up as furniture that looks tilted or "pasted on" rather than standing in the room. See why AI virtual staging looks fake for what that failure looks like once it's already in a generated result.
Quick test: look at a door frame or the line where two walls meet. If it visibly bows rather than running straight, the lens distortion is aggressive enough to work against you.
5. Occlusion
Nothing should block the room's key structural lines — no half-open door swung into frame, no person or pet mid-photo, no tripod or camera bag left in the shot. Occlusion does two things at once: it hides part of the room the model needs to read, and it sometimes gets "staged over," which can produce a strange ghosting artifact where furniture is generated on top of whatever was blocking the view.
Quick test: scan the frame edges and foreground — is there anything in the shot that isn't the room itself?
6. Room boundaries in frame
The photo should show where the room actually ends — all four corners implied, ceiling line visible, floor extending to at least one full wall. A tightly cropped shot that cuts off a wall mid-way or excludes the ceiling gives the model an incomplete room to work with, and it will sometimes extrapolate a boundary that doesn't match the real one, which reads as a subtle but real structural change.
Quick test: could someone who's never seen this room sketch its rough shape from the photo alone? If not, the framing is too tight.
What to never upload
Some photos aren't worth staging at all — no amount of a good angle or lighting fixes these:
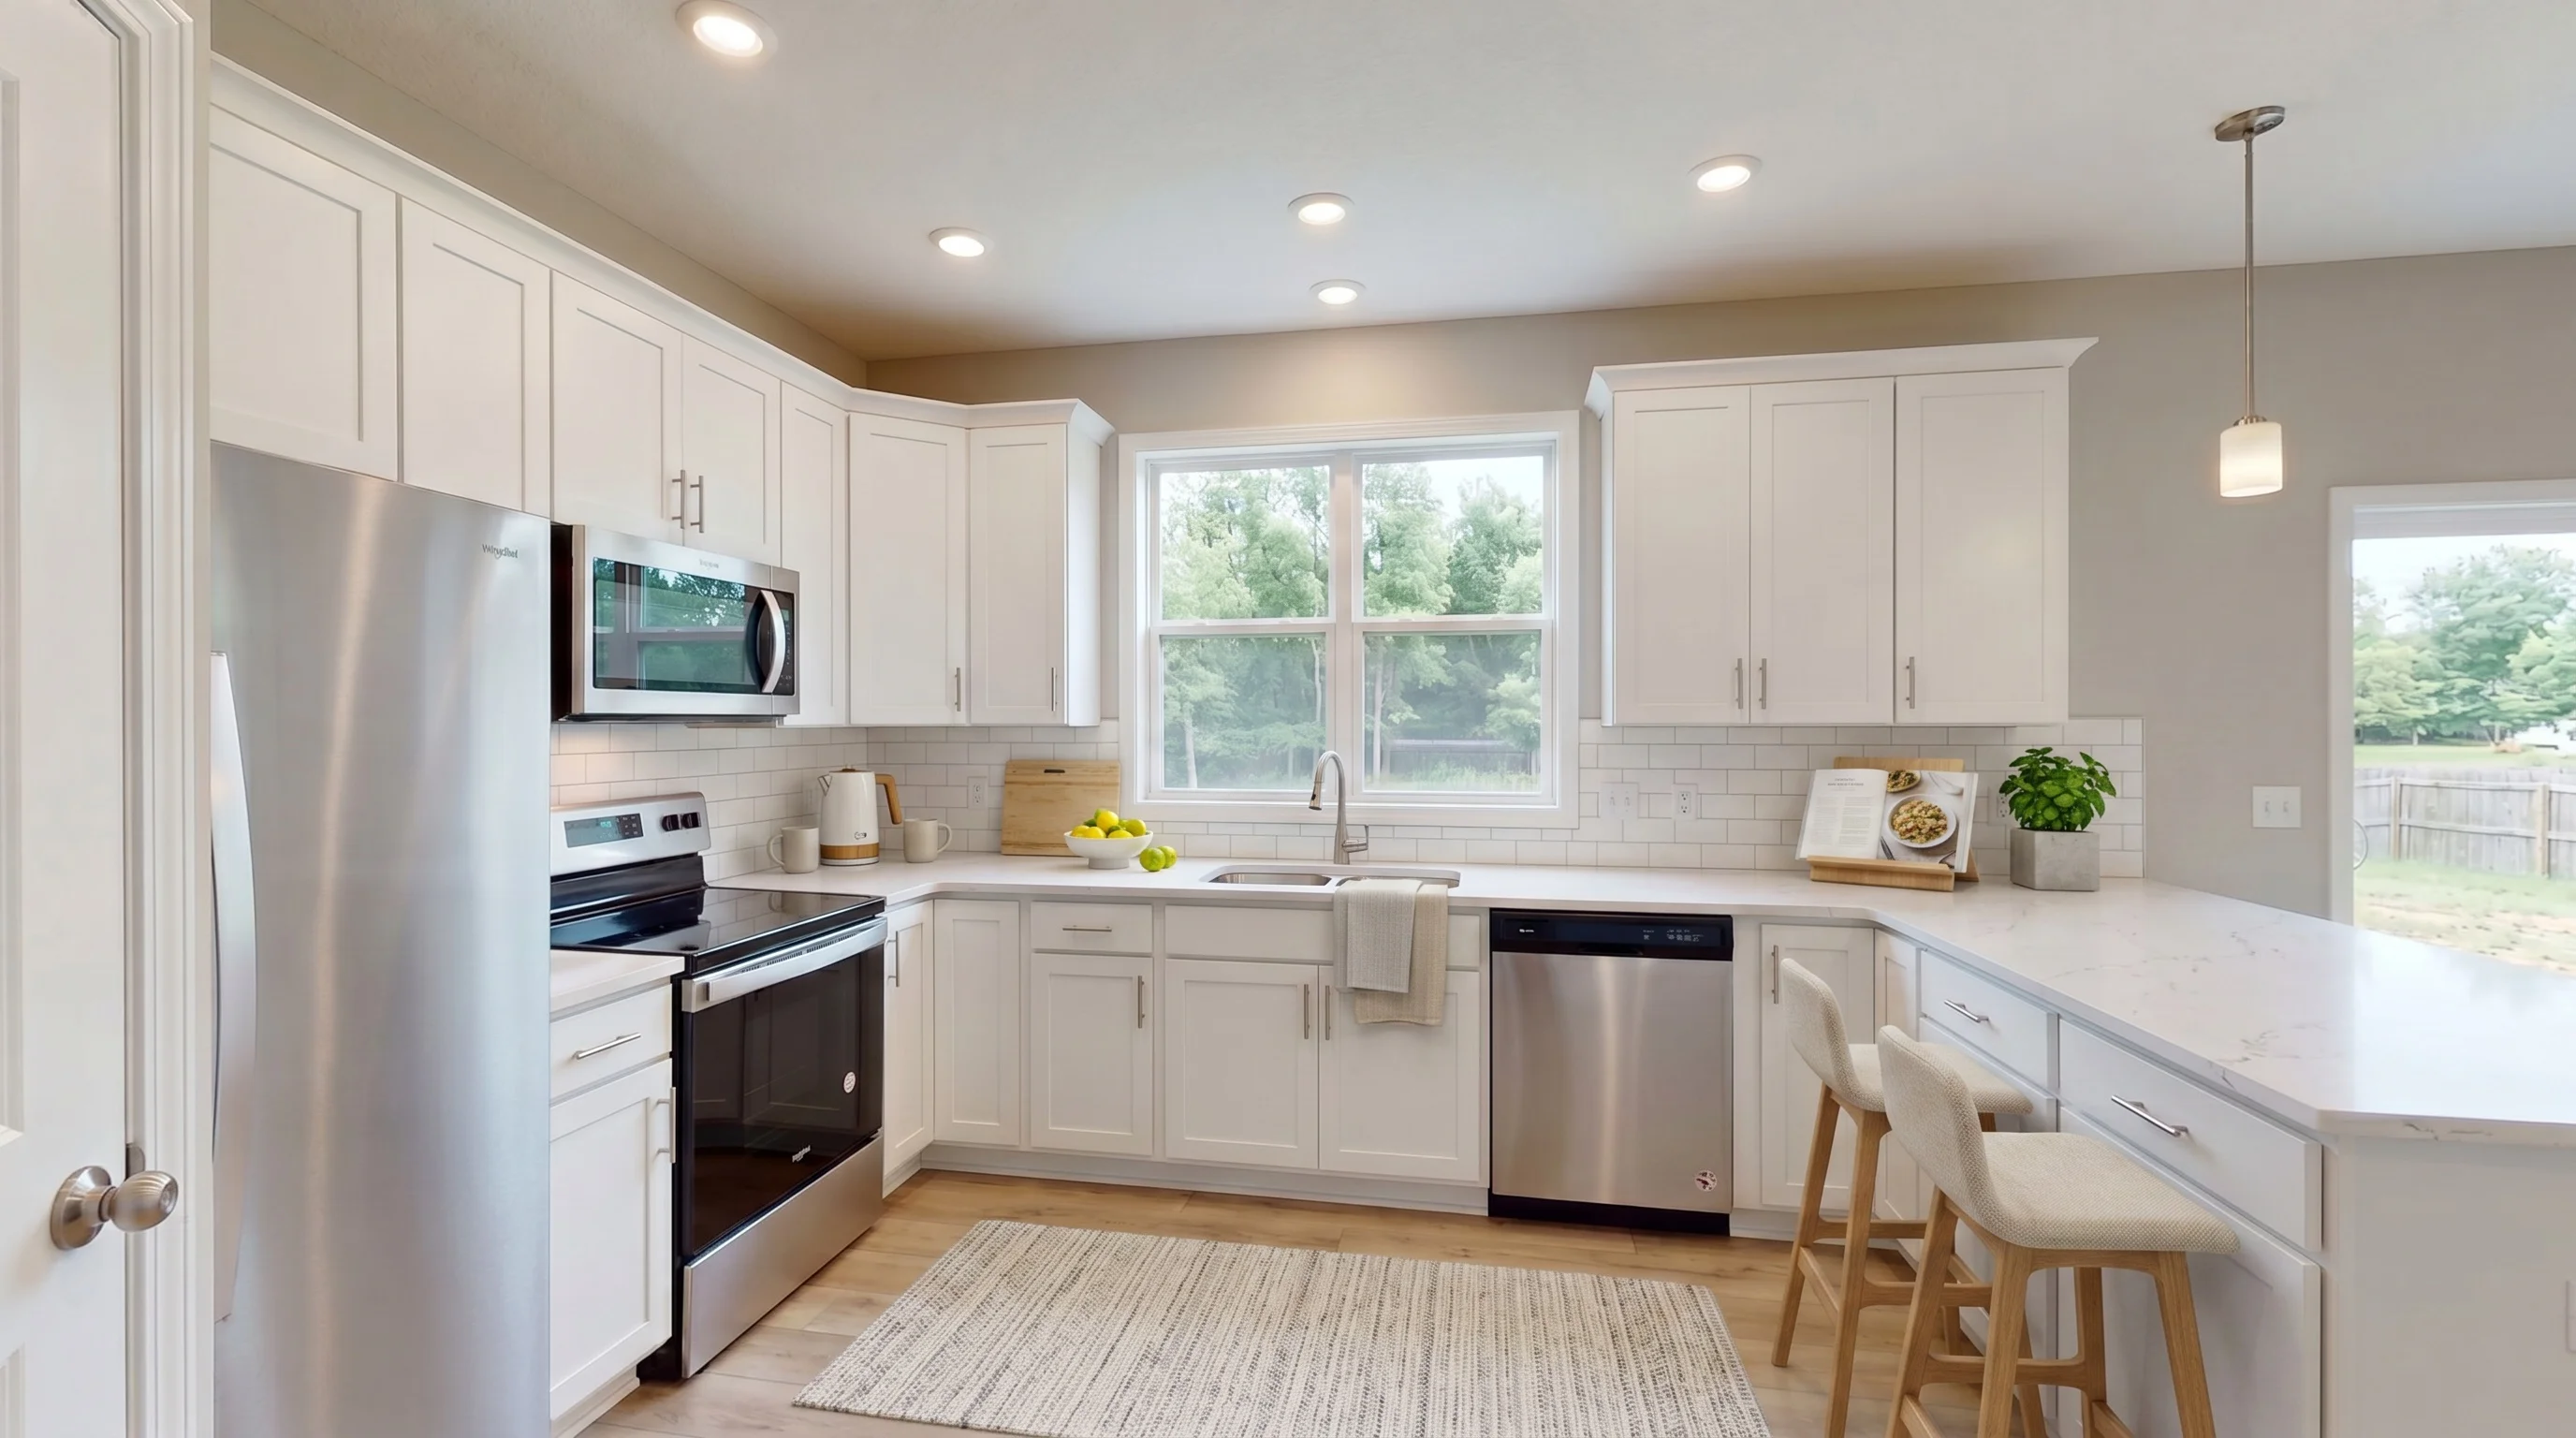
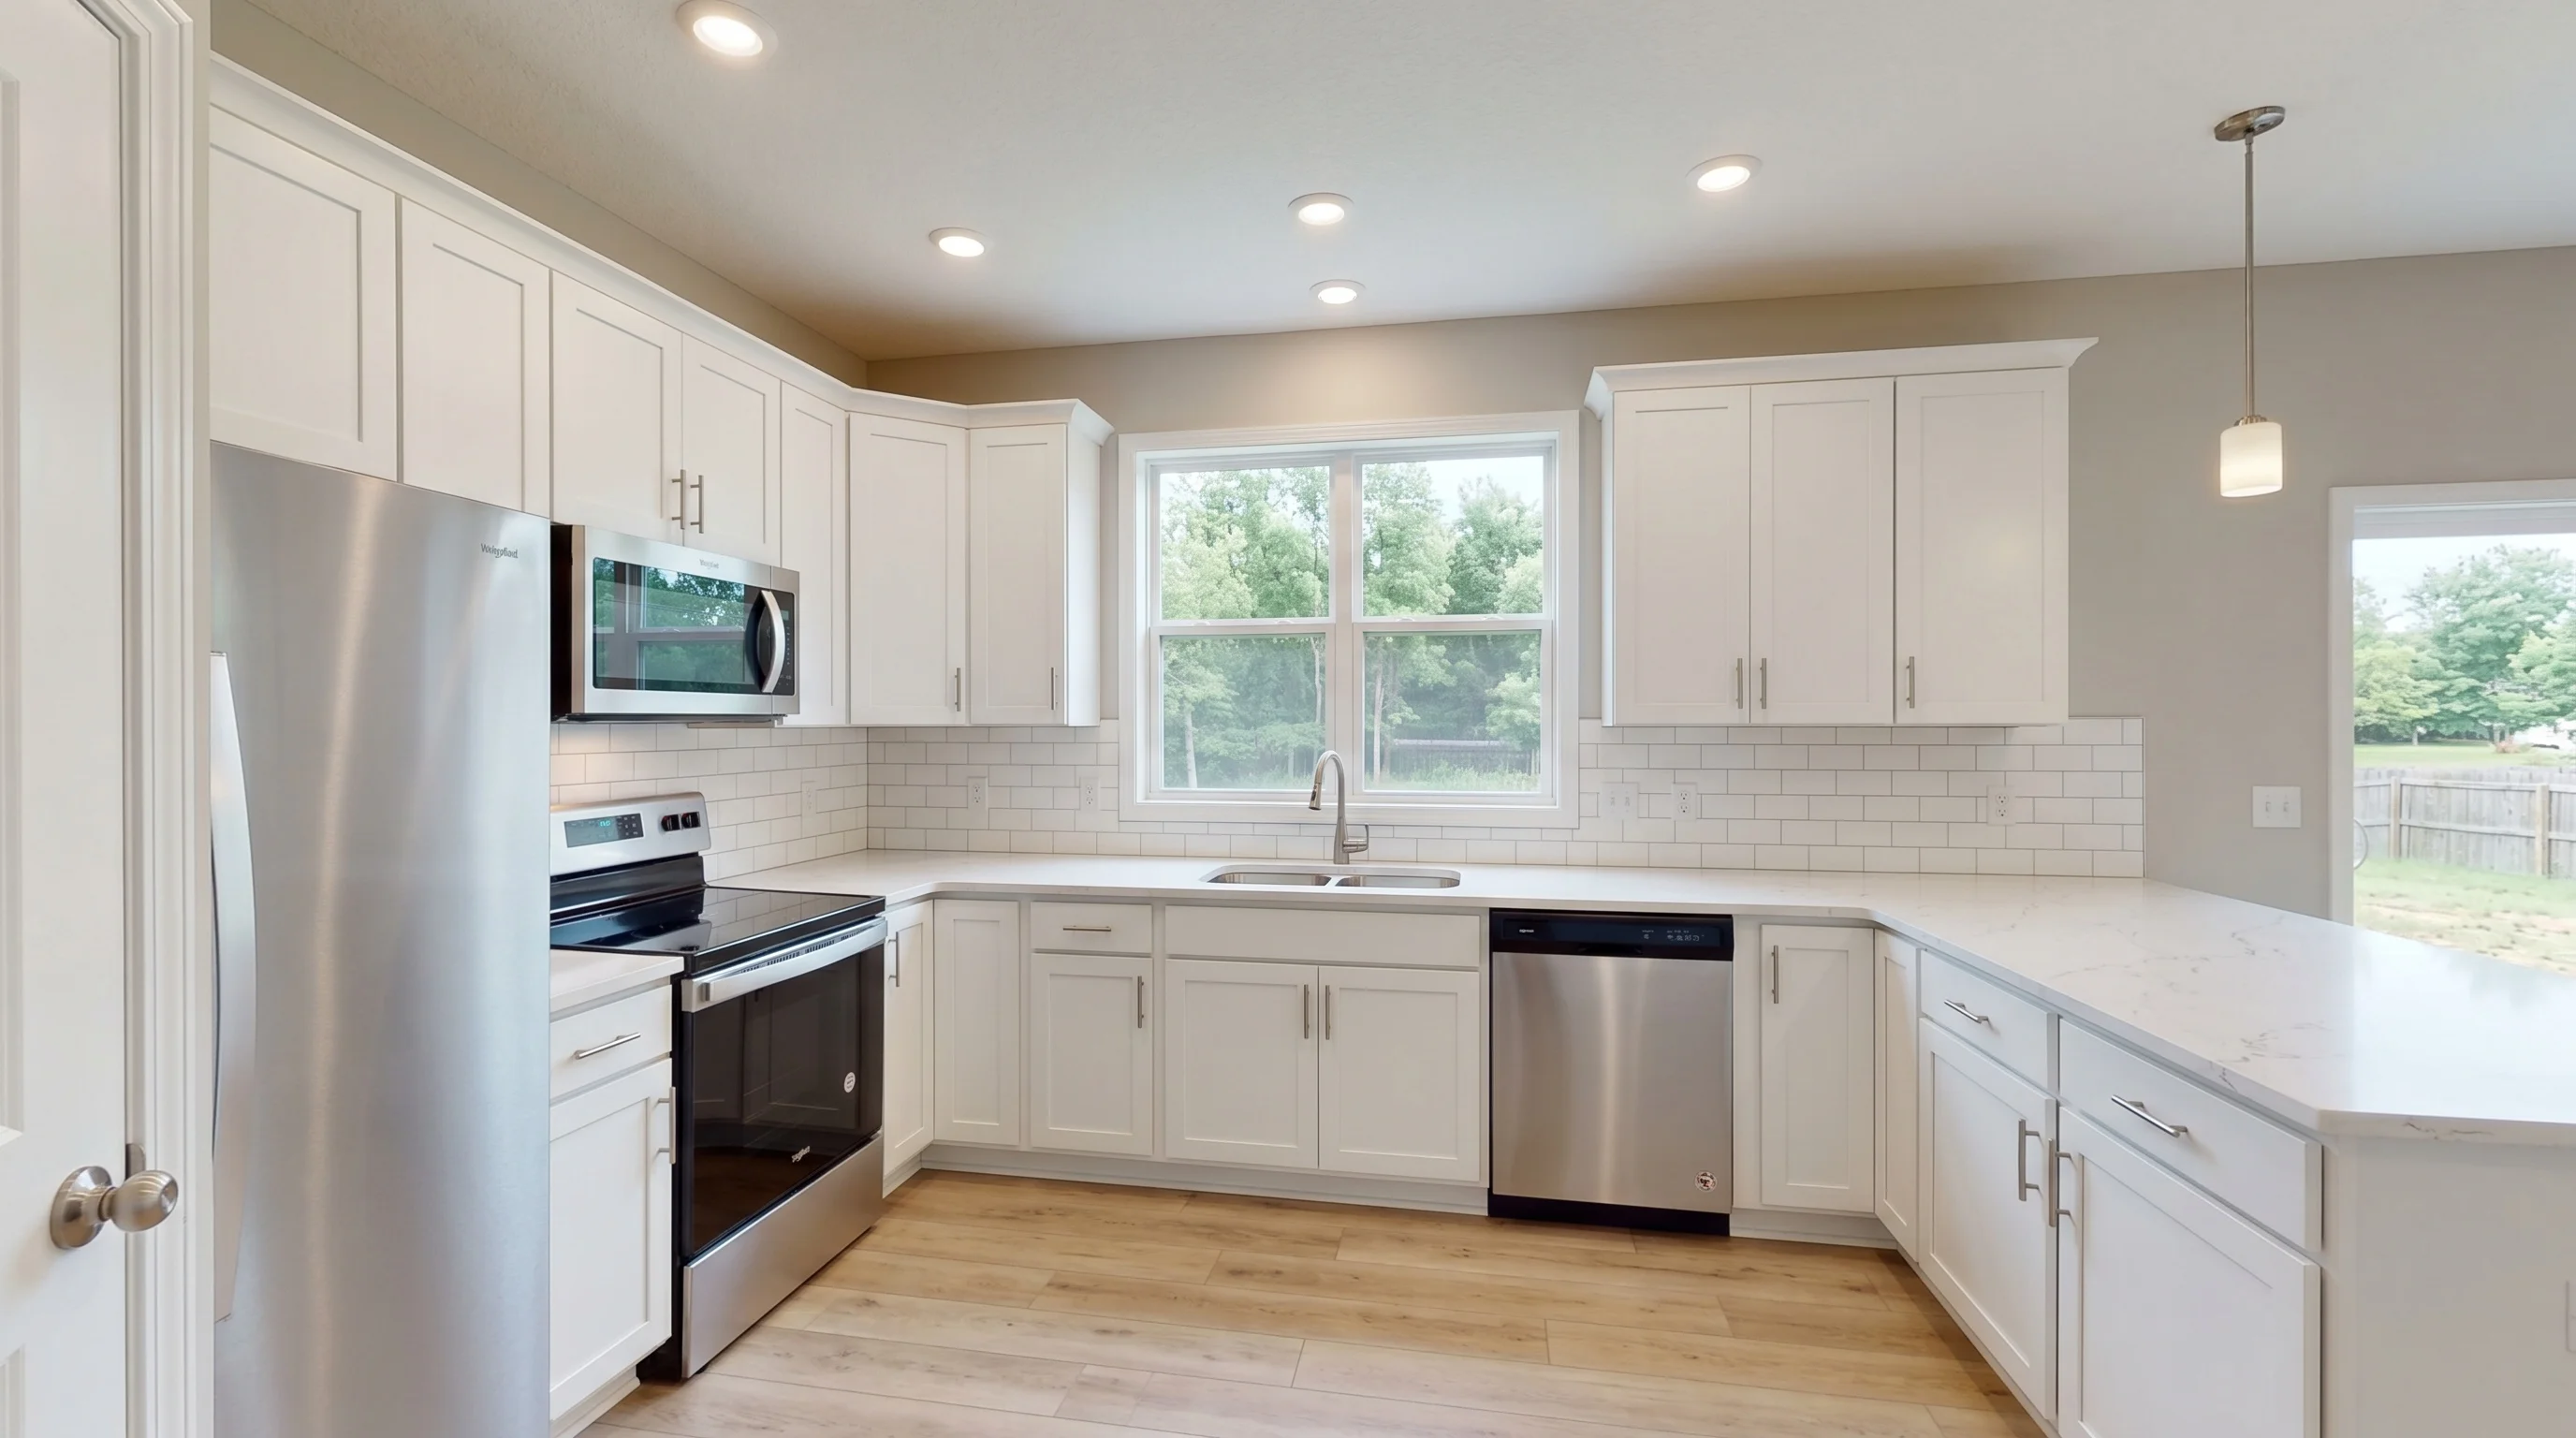
- A room with existing furniture or heavy clutter. Staging tools assume an empty room; pointing one at an occupied space usually confuses the model rather than replacing what's there. If the room isn't empty, that's a Furniture Removal job first, staging second — not a photo-quality problem, a tool-choice problem.
- A photo where the room's actual condition is a real defect — a water stain, damaged flooring, a crack in the wall. Staging furniture over a real defect doesn't fix it and can cross into misrepresenting the property. Photograph and disclose the defect separately; don't try to style around it.
- A duplicate angle you already have staged. If you've shot the same room from three angles, pick the one you'll actually use as the hero shot rather than staging all three — see which listing photos should you virtually stage for the fuller room-by-room version of this call.
- Anything so dark, blurry, or distorted that you can't tell what's in it at normal size. If you're squinting at the thumbnail trying to figure out what a shape in the corner is, the model will have the same problem, and it won't ask for clarification — it will just guess.
If the only photo you have fails the checklist
Reshoot if you can — five minutes with the lights on and the camera at chest height usually beats any number of regenerates on a flawed original. If a reshoot genuinely isn't possible (the listing's already live, the seller's unavailable, the photographer's gone), staging the imperfect photo isn't wrong, but expect to spend a generation or two working around it rather than getting a clean result on the first try. Photos with mild wide-angle distortion or slightly uneven light usually still stage fine — this checklist is about which flaws are worth fixing before you spend a generation, not a bar every photo must clear perfectly.
Frequently Asked Questions
Why does my virtual staging look bad even though the tool is supposed to be good?
Most of the time it's the source photo, not the tool. A generation can only work with what's in the frame — a doorway-angle shot, dark corners, blown-out windows, or heavy lens distortion caps how good any result can be, and the tool doesn't warn you before generating. Run the photo through the pre-upload checklist above before assuming the tool is at fault.
What camera angle is best for virtual staging photos?
Shoot from a corner of the room rather than the doorway, holding the camera at roughly chest height (~48 inches). This shows two walls and the full floor plane, giving the model a clear sense of the room's actual shape and where furniture should sit.
Does photo resolution actually matter for AI virtual staging?
Yes. A low-resolution or heavily compressed upload gives the model fewer real pixels to reconstruct textures, shadows, and edges from — the result comes out softer and less convincing than the same room shot at full resolution, even with an otherwise good angle and light.
Can I use a wide-angle or fisheye real estate photo for virtual staging?
Mild wide-angle framing is fine and common in real estate photography. Extreme fisheye distortion is the problem — it bends straight lines like door frames and wall seams into curves, which makes it harder for the model to infer the true room geometry and more likely that furniture looks tilted or pasted on rather than standing naturally in the room.
Should I stage a photo of a room that still has furniture in it?
Not directly. Staging tools are built to add furniture to an empty room, and pointing one at an already-furnished or cluttered space usually produces a confused result rather than a clean replacement. Clear the room digitally first with a furniture removal tool, then stage the empty result.
What's the single most common source-photo mistake agents make?
Shooting from the doorway instead of a corner. It's the fastest way to take a listing photo, but it foreshortens the room, hides most of the floor, and gives the model the least information to work with — it's directly behind furniture-scale errors, which are the most common complaint in AI staging.
Is a phone photo good enough for virtual staging, or do I need a real camera?
A phone camera is enough, as long as it's shot at full resolution rather than a compressed or cropped-down export. What actually decides the result is angle, light, and framing — a well-shot phone photo will outperform a poorly-shot DSLR photo on the checklist above.
Why was my photo upload rejected? Does virtual staging accept HEIC or iPhone photos?
VirtualStaging.tools accepts JPEG, PNG, and WebP — not HEIC, which is the default format iPhone cameras save to since iOS 11. If your upload was rejected without generating anything, this is almost always why. Switch your iPhone to Settings → Camera → Formats → Most Compatible so new photos save as JPEG, or convert the specific file before uploading. This is separate from the quality checklist above — a HEIC file gets rejected outright, it doesn't just stage badly.
If a photo fails the checklist, should I still try staging it?
If a reshoot is possible, do that first — it's faster than working around a flawed original through multiple regenerates. If you genuinely can't reshoot, staging an imperfect photo isn't wrong, but expect it to take an extra attempt or two rather than a clean result on the first try.
Check Your Photo, Then Stage It
Upload a listing photo and see the result in seconds — 3 photos free, no credit card.
Try Virtual Staging FreeMore from the blog
Related reading
Virtual Staging Pay Per Photo vs Subscription (2026)
Pay per photo for virtual staging or subscribe? How pay-as-you-go, credit packs, and monthly plans compare — and when each is cheapest for you.
Virtual Staging for Dining Rooms: Layouts, Styles, Costs
How to virtually stage a dining room: 4 layouts, 8 styles, pro stager rules, costs vs traditional staging, and what buyers spot in 10 seconds.

How Much Does Virtual Staging Cost? 2026 Price Guide
How much does virtual staging cost in 2026? Compare AI ($1–$5/photo), manual designer ($25–$75), and physical staging ($2,000+) — plus what's free.